


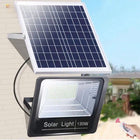


One or Two Solar Spotlights for a Garden Statue?

Start with one solar spotlight for a garden statue mainly seen from one direction. Add a second when it reveals an important detail that remains hidden after repositioning the first, or improves another view you regularly use. Give each light a specific job while keeping enough shadow to preserve the sculpture’s depth.
Choose the Views That Matter
Look at the statue from the places where you actually spend time: a patio chair, the back door, a garden bench, or a frequently used path. Name one primary view and, if needed, one secondary view. A side visible only while tending the planting bed does not automatically need an evening accent.
From each chosen position, identify the feature that makes the statue recognizable. That might be a face, an animal’s head, folded fabric, or the curved edge of an abstract form. Those details give each light a clear job. A dark rear surface can remain part of the composition when nobody normally views it.
| Your situation | Starting arrangement | What would justify a second light? |
|---|---|---|
| One main view; a simple, readable shape | One light slightly to the side of the viewing direction | A defining detail remains obscured after adjusting the first light |
| One main view; projecting arms, wings, folds, or deep recesses | One main light, with a second position available to test | A different lighting direction reveals a specific blocked surface |
| Two regularly used views around a central bed | Test one light from both viewpoints, then compare two | The second viewpoint loses the statue’s identity or an important side |
What One Light Does Well
One light creates a clear direction of illumination. Highlights and shadows can reveal the curve of a shoulder, the edge of a wing, or the texture of carved stone. For a statue seen mainly from a patio, try a position offset from the direct line between the seat and the sculpture. Adjust it until the important features are visible and the shadows help describe the form.
Distinguish a useful shadow from a missing detail. A darker cheek can give a face depth; a face disappearing completely behind a raised arm may need a different light position. Moving the first fixture around the statue can solve that problem without changing the light count.
Fit the illuminated area to the sculpture’s visible outline. If beam width is the remaining question, our narrow versus wide solar spotlight guide explains that adjustment. Here, the decision is whether another direction of light adds useful information.

Give the Second Light a Specific Surface
In the bird-statue example shown here, the first light models the wing and body, while the second adds light to the head and neck. Find a position with a clear line to the detail you want to reveal. A light placed immediately beside the first may simply reinforce the same highlights; moving it around the sculpture gives the beam a different approach.
For a statue viewed from both a patio and a garden bench, the second fixture may instead serve the bench-facing side. Judge the pair from both seats: a light that improves one view can expose its bright lens to the other. Small changes in position and aim often matter more than making the fixtures symmetrical.
Keep the first light as the main accent. With the NoxLumin spotlight featured below, start the second fixture in Medium mode and adjust its position and beam until the chosen detail reads clearly. Retain some shadow beneath wings or within folds to preserve depth. Use High mode only if the detail still needs more light after aiming.

Compare the Two Arrangements from the Same Seat
Make the comparison after dark with the surrounding patio and house lighting set as you normally use it. Begin with charged fixtures so an uneven charge does not dominate the comparison. Keep the main light in the same position while assessing what the second adds.
- First light only: identify the strongest feature and name any important detail that disappears.
- Both lights: check whether that detail becomes readable while the original shape and shadow pattern remain attractive.
- Secondary viewpoint: check the sculpture and the visible lenses from the other regular viewing position.
- Second light off again: decide whether its contribution is useful detail, a better second view, or simply more brightness.
Make the final judgment with your eyes. If you use phone photos for comparison, keep the viewpoint and exposure settings consistent; automatic exposure can make different arrangements look deceptively similar. A successful second light earns its place by improving a view you care about.
Keep the Accent on the Statue
Check where each beam travels beyond the sculpture. Open spaces between arms, wings, or abstract shapes can let light pass through toward a window or across the garden. Shift the fixture or aim at a solid surface that catches the beam. A slightly lower target can keep the useful light on the object.
DarkSky and the Illuminating Engineering Society’s outdoor lighting principles emphasize a clear purpose, careful targeting, and the lowest necessary light level. Apply those principles to the amount and direction of your accent lighting, and turn decorative lights off when they are no longer needed.
Look for glare from seated eye level as well as from the approach to the garden. A fixture can be low to the ground and still shine into someone’s eyes. Keep lights outside walking and mowing routes, with the beam aimed toward the statue rather than along the path.
A Product Match for Testing One Light Against Two
The NoxLumin Adjustable Solar Tree Spotlight in Warm White, 2 Pack provides two separate ground-stake fixtures. Each has a 180-lumen output, a 5°–90° adjustable beam, and High and Medium modes. These adjustments let you shape a main accent and compare a restrained second light on the part of the statue that needs it.
The White, 2 Pack option offers the same fixture design with a crisper white appearance. Use matching light colors on one sculpture unless you deliberately want a mixed-color effect. A two-pack also works for two separate focal objects that each look good with one light; pack quantity and lights per statue are separate decisions.


Each fixture’s solar panel and lamp head share a tilting assembly, so check daytime charging exposure at the same angle used for the nighttime accent. Place the panel clear of the statue’s shadow and surrounding foliage. The U.S. Department of Energy explains that shade and dirt can reduce solar conversion efficiency; a clear charging position is part of a workable lighting layout.
Install the stakes in firm, well-drained soil and reposition if you encounter a root or obstruction. The fixture is rated IP54 for weather resistance, so choose a position away from standing water and direct sprinkler jets. For other focal points, browse solar lights for trees and landscape uplighting after counting the lighting jobs in your garden.
Frequently Asked Questions
How many solar spotlights do I need for a garden statue?
Where should the second spotlight go?
Should two statue lights use the same brightness setting?
Can one spotlight illuminate both sides of a statue?
Should I choose Warm White or White for a garden statue?
Does a two-pack mean both lights must illuminate the same statue?
How can I keep statue lighting comfortable from a patio chair?
Get more NoxLumin guides on Google
Add NoxLumin as a Preferred Source to help Google show you more of our outdoor lighting guides in Search and AI experiences.


Leave a comment