




NoxLumin FAQ: Lighting, Shipping & Support
Choosing the Right Light
Find answers about NoxLumin outdoor solar lights, indoor LED sensor lights, rechargeable camping lanterns, shipping and returns. For brightness, dimensions, charging requirements and included accessories, check the exact product and variant you are ordering.
Need help with an existing order? Track your order, review our shipping policy or return policy, or contact support.
NoxLumin offers outdoor solar lights for gardens, paths, fences, entrances and other outdoor spaces, plus indoor LED sensor lights and rechargeable camping lanterns. Our range also includes selected hardwired outdoor fixtures.
Start with the area you need to light, then compare the power source, brightness, controls and mounting method. Not every NoxLumin light is solar-powered or intended for permanent outdoor use.
Choose pathway or landscape lights for route guidance and garden accents, motion-sensor wall lights for entrances, and appropriately sized floodlights for larger defined areas. Decorative lights create atmosphere but are not a substitute for task lighting.
Compare motion-sensor solar lights with automatic dusk-to-dawn solar lights. For a wide yard or multiple corners, plan several lighting zones rather than expecting one fixture to cover everything.
Dusk-to-dawn describes when a light switches on; motion sensing describes how it responds to movement. Some models combine both features, such as dim light after dark that becomes brighter when someone approaches.
Other models provide steady nighttime lighting or remain off until motion is detected. Check the selected variant's working modes: dusk-to-dawn operation does not guarantee continuous light until sunrise.
Lumens describe light output; watts describe power; LED count alone does not establish brightness. Also compare beam spread and mounting position to judge where the light will fall.
Battery capacity in mAh is not a runtime guarantee. Voltage, charging conditions and power consumption matter too. Read our solar-light battery and runtime guide rather than choosing by the largest battery number alone.
Warm white gives patios, seating areas and entrances a softer appearance. Neutral or cool white can suit task-focused spaces where you prefer a crisper appearance.
Check the listed color temperature and variant before ordering. Some lights let you change the color temperature on the fixture, while others have a fixed color chosen at checkout. A different light color does not automatically mean higher brightness.
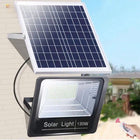
A separate-panel design can work when the lamp is in shade but the solar panel is outside in direct sun. An integrated-panel fixture needs a mounting position that also gives its built-in panel enough sunlight.
Check the supplied cable length and the lamp's intended installation environment. The separate-panel placement guide explains options for sheds, garages and covered spaces without relying on charging through glass.
Solar lights can add useful illumination where household electrical wiring is unavailable, but their output and runtime depend on stored battery energy and charging conditions.
Use them for the lighting task the model is designed for. Do not assume a decorative or motion-activated solar fixture can replace continuous, safety-critical or code-required lighting. For those applications, use an appropriately specified lighting system and obtain installation advice for your property.
Solar Charging & Nighttime Runtime
Solar lights can collect energy on cloudy days, but weaker sunlight may not fully recharge the battery. Direct outdoor sunlight is the reference condition for the charging times listed on product pages.
Keep the panel clear of roof shadows, trees and debris. After poor charging weather, expect shorter runtime or fewer high-brightness activations. See our cloudy-day solar charging guide for practical placement tips.
Some charging may occur when sunlight reaches the panel through glass, but it is less predictable than unobstructed outdoor charging. Tint, coatings, screens, shade and sun angle can all change the result.
Do not assume an outdoor charging-time claim applies indoors. Place the panel outside, choose a separate-panel light, or use an approved USB input when the product supports it. Our window-charging guide explains the differences.
Inspect the light and any panel cable, then follow the supplied instructions for the power switch, initial charging and mode selection. Place the panel in unobstructed outdoor sun for the model's recommended charging period before judging performance.
Some models must be switched on to charge. Button controls also vary: a press-and-hold may turn a model on while a short press changes modes. Test after dark before permanent mounting, and leave automatic operation enabled afterward.
All-night operation is not guaranteed for every model or setting. Runtime depends on the stored charge, battery capacity, brightness, operating mode, weather and frequency of motion activations.
Continuous high output uses energy faster than lower-output or occasional motion-triggered operation. Compare the product's runtime conditions, not just its maximum-hours claim, and test the selected mode at your installation site.
They may continue to work, but shorter days, lower sun angles, cloud cover, snow on the panel and temperature can reduce charging or runtime. A location that works well in summer may receive too little sun in winter.
Clear the panel gently, check for seasonal shade and use a lower-output or motion mode when available. Follow the model's operating and charging temperature limits; do not assume every light suits freezing conditions.
Only use USB charging if the specific product includes a compatible USB charging input. A solar-panel connector is not automatically a USB input, and an improvised cable or adapter can damage the product.
For example, the Vintage Solar & USB Rechargeable Camping Lantern supports both methods. Other solar fixtures may rely entirely on their supplied panel. Check the product's charging instructions before connecting a power source.
Installation, Weather Protection & Care
Solar fixtures do not need a household electrical connection, but separate-panel models still have a cable between the panel and lamp. Wall-mounted lights need suitable fixings; ground-stake lights need stable placement beside the walking route, not where they obstruct it.
Check the product's mounting instructions and included hardware. A hardwired fixture is different from a solar light: have mains electrical work handled by a qualified installer and follow local requirements.
Position the sensor with a clear view across the route people take, and follow the model's recommended mounting height and detection range. For an integrated solar light, that position must also provide adequate sunlight for the panel.
Avoid obstructions, moving foliage and nearby heat sources. Test detection from the actual approach after dark before finalizing the position; a listed sensor range is not a guarantee of coverage around corners.
Weather protection varies by product. Read the exact IP rating and installation instructions rather than assuming every solar light, indoor light or camping lantern has the same protection.
Outdoor weather resistance does not automatically permit submersion, standing water or pressure washing. Keep connectors correctly sealed and charging ports protected. Indoor cabinet lights should not be used as permanent exterior fixtures unless the product specifically allows that use.
Use only a cable or extension confirmed as compatible with the exact light and panel. A matching-looking plug does not establish compatibility, and extra cable length or joints can affect performance and weather protection.
Contact us with the product link or order number before purchasing an extension. Do not splice the cable or close a door or window onto it. Follow the connector instructions and keep connections out of pooled water.
Keep the solar panel, light lens and sensor free of dirt, leaves and snow. Use the cleaning method in the product instructions; avoid abrasive tools, pressure washing or letting water enter connectors and ports.
Inspect cables, fixings and seals for damage. Before longer storage, follow the model's battery-care guidance and store the light in a suitable dry location. Do not continue charging a product with a damaged cable, battery or charging port.
Troubleshooting Solar Lights
Check the charge, power switch and selected mode before assuming the light is faulty.
- Charge the panel in unobstructed outdoor sun for the period specified for your model.
- Make sure the light is switched on and not in Manual Off. Follow the model's button or remote instructions.
- Test after dark, away from nearby lighting. For a daylight test, cover the daylight sensor or panel only if the instructions allow it.
- If a motion mode is selected, move within the sensor's detection area.
- On separate-panel models, check that undamaged cable connections are fully seated and correctly sealed.
Uncover the panel afterward and leave the intended automatic mode enabled. If it still does not work, contact us with your order number and the test results.
Limited daytime charging, high brightness, frequent motion triggers or a selected timer can shorten the lighting period. Some modes also intentionally return to dim light or switch off when movement stops.
Check the mode and timer first, clean the panel and allow a full recommended charging cycle in good sunlight. If performance remains poor under suitable conditions, contact us rather than repeatedly assuming the weather is the only cause.
For missed detections, check that a motion mode is selected, ambient light is low enough and nothing blocks the sensor. Test across the intended walking route within the model's range.
Repeated activation can be caused by passing traffic, pets, moving foliage or nearby heat sources. A constant-on or dim-background mode can also look like a fault when it is working as intended. Reposition the light or adjust settings only where the model supports adjustment.
Confirm that the light has charge and its main power control is enabled. Check the remote's correct battery type, polarity and condition; remove a shipping isolation tab only if one is fitted.
Try again close to the light, following the product's aiming or pairing instructions. Do not assume every remote uses the same control method. If the on-body control works but the remote does not, tell us the model and what you tested.
Replacement options depend on the exact model and component availability. Some rechargeable batteries are built into sealed housings and are not intended for user replacement.
Contact us with your order number, product name and a photo of the part or connector before buying a replacement. Do not open a weather-sealed housing or substitute an unapproved battery, panel or charger unless the product instructions specifically permit it.
Indoor Sensor Lights & Camping Lanterns
Choose motion mode for brief, hands-free lighting in a closet, hallway or cabinet. Choose always-on mode for longer tasks, such as preparing food or organizing a shelf, when continuous light is needed.
Always-on operation uses the battery faster. Available modes and low-light detection differ by model, so check the controls on your USB rechargeable motion-sensor cabinet light.
Check the battery charge and mode first. A sensor mode designed for low ambient light may intentionally remain off in a bright room, even when it detects movement.
Test in a darker area with the sensor unobstructed. Cabinet doors, stored items or mounting trim can block its view. Use always-on mode as a comparison test when the model provides it, and contact us if the light still does not respond.
On compatible models, the light attaches to a magnetic surface or to the supplied mounting plate. Measure the available space, check door clearance and prepare the mounting surface according to the instructions.
Leave room to detach the light for charging without pulling off the mounting plate. Use the specified USB input and power source. Magnetic or adhesive mounting does not make an indoor light suitable for wet outdoor locations.
Runtime depends on the model, brightness, number of active light panels and operating mode. A motion-sensor estimate based on a few short activations per day is not equivalent to the same duration of continuous illumination.
Use the product page's mode-specific figures to plan your use. Recharge before a trip or outage, and allow extra charging time when the power source or conditions differ from those specified.
Only models with a specified USB power output can charge compatible devices; a charging input alone does not provide that function. The 6000-Lumen Rechargeable Camping Lantern includes an emergency USB power output.
Charging a phone uses the lantern's battery and reduces lighting runtime. Check compatibility, keep ports dry and plan your lighting needs before using the battery for another device.
Shipping, Orders & Payment
We primarily ship to the United States, Canada, Australia and European Union countries. For another destination, check availability at checkout or contact us before ordering.
Please provide an accurate street address and current contact details. We do not accept PO Box addresses. Shipping availability can depend on the destination and the selected product.
Orders totaling US$15 or more qualify for free shipping. Orders below US$15 have a US$10 shipping fee.
Review the final shipping charge shown at checkout before paying, and contact us if it differs from the amount you expected.
Our warehouses are in San Francisco, United States, and Shenzhen, China. The dispatch location depends on stock availability and your destination.
An order delivered to the United States does not necessarily ship from a US warehouse. If local stock is unavailable, it may ship by air from Shenzhen. See our shipping policy for details.
Our shipping policy gives an estimated delivery time of 7–10 days, depending on your location and stock availability. When local stock is unavailable and an item ships from Shenzhen, delivery may take 1–2 days longer.
These are estimates, not guaranteed arrival dates. Check your shipping notification and carrier updates, and contact us before ordering for a time-sensitive project.
We email a tracking link after your order ships. Use that link or visit our order tracking page to check the shipment.
If you cannot find the shipping email, check your spam folder and the email address used at checkout, then contact us with your order number.
Multi-item orders may arrive in separate shipments. Check your shipping notifications for additional tracking numbers before assuming an item is missing.
If the delivered package does not match its contents or you cannot identify another shipment, contact us with your order number and the items received.
Check the delivery location shown by the carrier, your front door, mailbox and other usual drop-off areas. Ask household members or building staff whether they accepted it, and review any delivery photo or available camera footage.
If the package is still missing, contact NoxLumin support with your order number and tracking number so we can review the shipment with you.
Contact us as soon as possible, before the order ships. Our shipping policy allows cancellation before shipment with a full refund.
Address corrections depend on whether dispatch can still be stopped. We cannot guarantee changes once a parcel has shipped. Include your order number and the requested correction when contacting support.
Check your payment details and billing address, then use another payment option shown at checkout. If available, try the separate Credit and debit card payments option or PayPal.
If payment still fails, ask your card issuer about the decline or contact us with the error message. Please do not send your full card number, security code or password by email or chat.
Our tax-exemption process explains how to request a review. It currently asks you to place the order first, then reply to the confirmation email with a State Exempt Certificate and IRS 501(c)(3) Tax Exempt Letter.
After review and approval, the sales tax associated with the purchase is refunded. Contact us before ordering if your organization's documents or circumstances differ; submitting a request does not guarantee approval.
Returns & Customer Support
You have 60 days from receipt to request a return. For a standard return, the item must be in the same condition as when you received it.
Contact support@noxlumin.com before sending anything back. If the return is approved, we provide a return shipping label and instructions. Returns sent without a prior request are not accepted. Read the refund policy, and contact us separately about damaged, faulty or incorrect items.
Inspect your order on arrival and contact us promptly if an item is damaged, defective, incorrect or missing a listed part.
Include your order number, the affected product and clear photos of the item and packaging. For an operating problem, a short video and the charging or troubleshooting steps already tried can help us assess it. Do not continue using or charging visibly damaged electrical components.
After we receive and inspect your return, we notify you whether the refund is approved. Approved refunds are issued to the original payment method within 10 business days; your bank or card provider may need additional time to post the credit.
If more than 15 business days have passed since approval, contact support@noxlumin.com.
Email support@noxlumin.com, use our contact form, or open the website's live chat when available. Live chat is not staffed 24 hours a day; offline inquiries are followed up by email.
Include your order number or product link, the selected variant and a clear description of the question. For technical, warranty or replacement-part inquiries, add relevant photos and any steps already tried so we can review the exact model.