




Solar vs Low-Voltage Landscape Lighting: Which Fits Your Yard?

Choose standalone solar landscape lights when the proposed locations receive good sunlight and you want flexible placement without running a shared power cable. Choose a wired low-voltage system when you want centrally controlled lighting across a planned layout, especially in shaded areas. A yard can use both: the better choice follows the job, the available energy source, and the hours you actually need the lights.
A sunny garden border used after dinner and a shaded front walk used every night need different lighting plans. Compare the power system first, then choose the fixtures.
What are you comparing: fixtures or power systems?
A standalone solar light combines a solar panel, rechargeable battery, and lamp. An integrated model keeps those parts together; a separate-panel model connects its lamp to a panel placed elsewhere.
A conventional low-voltage landscape system instead uses a transformer supplied by household electricity and cables serving compatible fixtures. LSU AgCenter's landscape lighting guide describes the common conversion from 120V household power to 12V landscape lighting. Here, “low-voltage” means that wired system, even though solar lights also use low-voltage components internally.
Both categories can include LED lights. “LED” identifies the light-producing technology; it does not tell you whether a fixture uses solar energy or household power.
Compare the decisions that affect your yard
| Decision | Standalone solar lights | Wired low-voltage system |
|---|---|---|
| Energy at the location | Each panel needs a suitable place to collect sunlight. | The layout needs a suitable power source, transformer location, and cable route. |
| Evening operation | Available lighting time depends on stored charge, settings, and the model. | Operating times can follow compatible timers or controls while electrical power is available. |
| Moving fixtures | Independent stake lights are easy to reposition within suitable sunny locations. | Moving a fixture may require changing its cable connection or route. |
| Adding lights | Add independent fixtures and check each new position for sunlight. | Check transformer capacity, cable design, and fixture compatibility before expanding. |
| Routine care | Keep panels clear and follow model-specific battery and cleaning guidance. | Inspect fixtures, exposed cable, connections, and controls according to system instructions. |
Make two maps: sunlight and cable routes
For solar lights, mark where you want illumination and then observe those locations at different times of day. The important surface is the panel itself. A bright patio may still leave a small panel shaded by a railing, shrub, or roof edge. Our solar-light placement guide for shaded yards explains how to assess those conditions in more detail.
For a wired system, sketch the route from the proposed transformer to the fixtures. Include paths, planted beds, mature trees, and areas that receive regular digging or edging. This shows whether a seemingly simple row of lights will require a straightforward cable run or a more involved installation.
Consider a front yard with an open flower bed and a walk under a dense tree canopy. The bed may suit independent solar accents, while the shaded walk may favor a wired circuit. Treat those as two lighting zones rather than forcing one power source to serve every corner.
For electrical work, follow the selected system's instructions and applicable local requirements. Have a qualified electrician handle new mains wiring or receptacles. Cable sizing, routing, and transformer selection belong to the actual system design, not a universal garden-light spacing rule.
Match operating hours to the job
Ask when someone will use each area. A seating corner enjoyed after dinner may need light for a limited evening period. A front approach used at variable hours calls for a different operating plan. Write down the desired hours before comparing advertised runtime or control features.
Solar runtime figures describe particular charging and operating conditions. For a wired system, check whether the proposed controls provide the schedule you want, including seasonal changes. With either system, check the dusk behavior and the controls that determine evening operating time.
Where lighting is essential for steps, emergency access, or another safety-critical task, select a dedicated solution that meets that need and any applicable requirements. Decorative path accents can complement that lighting.
Compare complete setups before choosing
For a solar layout, list the number of fixtures, their sun exposure, and any mounting accessories required by the chosen model. For a wired layout, include compatible fixtures, transformer, cable, approved connectors, controls, and installation work. Comparing a solar multipack with only the fixture portion of a wired system leaves out part of the decision.
If you expect to redesign a flower bed frequently, independent solar fixtures offer useful flexibility. For a wired layout, plan likely additions when choosing transformer capacity and cable routes, so future changes fit the system.
Keep maintenance access in mind. Leave panels reachable for cleaning and make control locations convenient to use. Keep connections and fixtures clear of routine garden work in accordance with their installation instructions.
Three solar options for different landscape jobs
Match the fixture to the part of the landscape you want to light: a path edge, a focal point, or a wider outdoor area.
For an open path: 50-lumen warm-white pathway lights
The NoxLumin 50-Lumen Solar Pathway Lights are one example for a sunny path edge or planted border. Each fixture has a 2700K warm-white LED filament light, an integrated panel, an 800mAh rechargeable battery, and an IP65-rated ABS housing. A ground stake supports placement in suitable soil beside the walking surface.
The product lists approximately 8–12 hours of operation after a full charge, with approximately 6–8 hours of direct sunlight for charging. Actual operation varies with season, shade, weather, panel condition, and battery age. The dusk sensor turns the light on after dark and off during the day.
Choose the 2-, 6-, or 12-light pack according to your planned positions. Use a small initial layout to assess the result where practical, then expand to the remaining suitable locations. You can also browse the solar pathway and garden lights collection for other styles.


For a tree or statue: adjustable solar spotlight
The NoxLumin Adjustable Solar Tree Spotlight suits a focal point rather than a row of path markers. Its 180-lumen output and 5°–90° adjustable beam let you concentrate light on a trunk or statue, or widen the pattern for a nearby feature. High and Medium output modes provide another way to tune the effect.
For a canopy accent, tilt the lamp upward toward the selected branches and check the illuminated area after dark. Choose suitable soil beside the tree, avoid roots when placing the stake, and aim the light onto the foliage. The panel and lamp share the tilt, so check daytime sun exposure as well as nighttime aiming. Choose Warm White to coordinate with warm path lighting, or White for a crisper appearance.


For a larger driveway or yard: 300-LED separate-panel solar floodlight
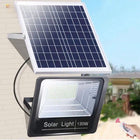
The NoxLumin Outdoor Solar LED Floodlight with Separate Panel and Remote lets the lamp and energy collection point occupy different positions. Its supplied 16.4 ft (5 m) cable can place the panel in sun while the lamp serves a nearby shaded area. Measure the actual cable route around mounting surfaces before choosing the positions.
Remote brightness adjustment and 3-, 5-, and 8-hour timer settings help match illumination to evening use. The 300-LED version provides approximately 3,000 lumens, an 8,000mAh LiFePO₄ battery, and a 6V/6W solar panel for larger driveways, yards, and outdoor areas that need more light. Aim the lamp toward the intended area and select a suitable brightness setting. The cable links the supplied solar components; household power is not needed.


Use a mixed layout with a consistent appearance
A mixed layout works best when each group has a clear purpose: for example, a wired system serving the shaded approach and independent solar lights marking an open garden border. Coordinate light color and visual intensity rather than expecting every fixture to share the same power supply.
View the result from the patio, windows, and normal walking direction. A lamp that looks attractive from the garden may shine directly toward a seated person. DarkSky and the Illuminating Engineering Society's outdoor-lighting principles favor light that serves a purpose, stays directed where needed, uses an appropriate level, operates when needed, and favors warmer colors.
Finalize spacing from the actual light pattern instead of dividing the path length by the number of lights in a pack. Our solar path-light spacing guide provides a starting framework for that separate layout decision.
Choose solar for flexible lighting in suitable sunny locations, a wired system for a planned network with coordinated controls, or a mix that gives each part of the yard the power source it needs.
Frequently asked questions
Are solar landscape lights also low voltage?
Are wired landscape lights always brighter than solar lights?
Which system is a better fit for a shaded front walk?
Can I connect these solar lights to an existing 12V landscape circuit?
Can solar and low-voltage lights look consistent in the same yard?
Will solar path lights work during a household power outage?
How should I choose a pack size for solar pathway lights?
Get more NoxLumin guides on Google
Add NoxLumin as a Preferred Source to help Google show you more of our outdoor lighting guides in Search and AI experiences.


Leave a comment