









Narrow vs Wide Beam Solar Spotlights: Which Is Better for Trees, Statues, and House Facades?

Quick Answer
A narrow solar spotlight beam is best when you want to emphasize a tree trunk, column, statue, or another relatively small feature from a distance. A medium beam usually works best for complete small-tree uplighting, while a wide beam is more suitable for shrubs, short walls, broad facades, and nearby planting beds. The correct choice depends on the size of the subject, the light-to-subject distance, and how much spill you can accept—not simply on which setting looks brightest.
Why Beam Width Changes the Result
Two solar spotlights with the same lumen rating can produce very different nighttime scenes. A narrow beam concentrates light into a smaller area, so its center often looks brighter and reaches farther. A wide beam distributes light over a larger surface, producing softer coverage but less apparent intensity at any one point.
DarkSky International defines beam spread as the angle between the directions where light intensity falls to a specified percentage of the maximum. In practical backyard terms, beam angle determines whether a fixture creates a tight vertical column, a balanced accent, or a broad wash of light.
This distinction matters when lighting irregular outdoor subjects. A mature oak has a narrow trunk and a wide canopy. A garden statue may be tall but only a few feet wide. A foundation planting can be low and broad. Using the same beam setting for all three usually creates either dark gaps or unnecessary spill.
Key Takeaways
- Use approximately 5°–15° for tall trunks, narrow statues, columns, and long-distance accents.
- Use approximately 20°–40° for small or medium trees, larger sculptures, and focused facade sections.
- Use approximately 50°–90° for shrubs, planting beds, short walls, and broad subjects viewed from nearby.
- A narrower beam can appear brighter without producing more total lumens.
- Distance changes coverage: moving a fixture farther away makes the same beam cover a larger area.
- Choose the lowest brightness and narrowest beam that fully covers the intended subject without obvious spill.
Beam Width at a Practical Backyard Distance

Beam coverage can be estimated using the beam angle and the distance between the light and the subject. The following figures show approximate beam diameter at 10 ft (3 m). Real results vary because lenses do not have perfectly sharp edges, and brightness gradually decreases toward the outside of the beam.
| Beam angle | Approximate coverage at 10 ft (3 m) | Typical appearance | Best starting use |
|---|---|---|---|
| 5° | 0.9 ft (0.27 m) | Very tight, high-contrast spot | Slender trunk, column, narrow sculpture |
| 15° | 2.6 ft (0.80 m) | Focused accent | Tree trunk and main branches |
| 30° | 5.4 ft (1.63 m) | Balanced medium beam | Small tree, statue, facade detail |
| 60° | 11.5 ft (3.52 m) | Broad, softer wash | Shrubs, planting beds, short walls |
| 90° | 20 ft (6.10 m) | Very wide coverage with lower center intensity | Nearby broad surfaces and low landscaping |
If the fixture is moved from 10 ft to 20 ft (3 m to 6.1 m), the approximate beam diameter doubles. However, the illuminated surface will generally look dimmer because the light is spread across more area and travels farther. This is why a wide beam placed far from a tall tree may illuminate the lower yard while leaving the upper canopy visually weak.
Key Decision Factors
1. Subject width
Match the beam to the visible width of the feature, not the total size of the yard. A narrow beam may suit a 2 ft-wide statue even when the surrounding garden is large. A wide Japanese maple may need a medium or wide setting even if the tree is relatively short.
2. Fixture distance
A spotlight placed close to a tree needs a wider setting to cover the canopy. Moving it farther away naturally increases coverage, allowing a narrower beam to illuminate more of the tree. For more detailed distance guidance, see How Far Should Solar Spotlights Be from a Tree?
3. Desired contrast
Narrow beams create stronger contrast between the illuminated subject and the surrounding darkness. This works well for architectural accents and dramatic trunks. Wider beams create a calmer, more continuous scene but can flatten texture if every nearby surface receives the same amount of light.
4. Surface color and texture
Light-colored stone, siding, and pale bark reflect more light than dark foliage or rough tree bark. A wide beam aimed at a light wall can create more visible spill than the same setting aimed into dense evergreen foliage. Begin with medium brightness and adjust after full darkness.
5. Neighbor and viewer sightlines
A technically well-lit tree can still be uncomfortable if the LED source is visible from a patio chair, bedroom window, sidewalk, or neighboring property. DarkSky’s responsible lighting principles recommend targeting light only where needed and using no more light than necessary. The National Park Service outdoor lighting guidance similarly emphasizes proper distribution, shielding, controls, and prevention of light trespass.
Narrow, Medium, and Wide Beams Compared
| Beam type | Suitable uses | Unsuitable uses | Main limitation |
|---|---|---|---|
| Narrow beam | Tall trunks, narrow statues, columns, distant focal points | Wide shrubs, broad walls, nearby planting beds | Can create a bright stripe with dark areas beside it |
| Medium beam | Small-to-medium trees, sculptures, facade sections | Very narrow details or extremely broad subjects | May require careful distance adjustment |
| Wide beam | Shrubs, low trees, planting beds, short walls | Tall distant trees and narrow architectural details | Lower apparent intensity and greater spill risk |
Choosing a Beam for Common Outdoor Features

Large backyard tree
Start with a 15°–30° beam aimed through the trunk toward the primary branches. If only the trunk is visible, widen the beam or move the fixture farther back. If light extends beyond the canopy, narrow the beam or move the fixture closer. Two or three controlled medium beams often produce a more dimensional result than one extremely wide beam.
Garden statue
Use a narrow or medium beam that is slightly wider than the statue. Aim from an offset position rather than directly from the front to reveal texture and shape. Keep the fixture below normal eye level and confirm that the LED is not visible from the main viewing area.
Foundation shrubs
A 40°–60° beam is a reasonable starting point for grouped shrubs. Avoid illuminating every leaf evenly. Leaving some shadow between plants provides depth and reduces the amount of light reaching windows and adjacent properties.
Exterior wall or facade detail
Use a medium beam for a doorway surround, stone section, or architectural column. A wider setting can wash a short wall, but an upward-facing beam should terminate on the building rather than continuing into the sky. Check for reflections from windows, glossy siding, and pale stone.
Common Mistakes
- Choosing the widest beam automatically: Wider coverage can reduce useful intensity and illuminate areas that were never meant to be highlighted.
- Aiming before full darkness: A beam that looks subtle at dusk may create glare after surrounding light levels fall.
- Pointing the LED toward viewers: Seeing the source directly is often more uncomfortable than seeing the illuminated subject.
- Ignoring seasonal foliage: A deciduous tree may block light in summer but allow the beam to reach a window or sky after leaves fall.
- Using high mode when medium is sufficient: Excess output can increase glare and may reduce overnight runtime.
- Placing the solar panel in tree shade: Correct beam selection cannot compensate for an undercharged battery.
Practical Nighttime Checklist
- Identify the exact trunk, branch, statue, shrub, or wall section that should be visible.
- Begin with a medium beam and medium brightness.
- View the result from the patio, street, main windows, and neighboring property direction.
- Narrow the beam if light extends beyond the subject.
- Widen the beam only if important portions of the subject remain dark.
- Confirm that the LED source is not directly visible at normal eye level.
- Check the result again after leaves fall or landscaping changes.
- Verify that the solar panel receives sufficient direct sunlight throughout the charging period.
Product Recommendation
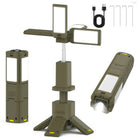
The NoxLumin High-Power Solar Tree Light is relevant when one fixture needs to switch between a focused accent and a broad landscape beam. Its lens adjusts from 5° to 90°, with a listed output of 180 lumens and an illumination range of up to 10 m (32.8 ft). It uses a 2200mAh rechargeable battery, offers high and medium modes, and is rated for more than eight hours of operation after a full charge under suitable conditions.


The integrated monocrystalline panel requires approximately six to eight hours of direct sunlight. Its IP54 rating makes it weather-resistant against limited dust entry and splashing water, but it should not be installed in standing water or treated as a submersible fixture. Warm-white and white variants are currently available. Additional compatible fixtures can be found in the Outdoor Lights and Solar Energy Lights collections.
Frequently Asked Questions
What beam angle is best for a large tree?
Is a narrow beam brighter than a wide beam at the same lumen rating?
How far should a solar spotlight be from a tree?
How do I prevent glare from a ground-stake solar spotlight?
Should I use warm white or white light for landscape uplighting?
Do solar landscape spotlights need direct sunlight?
Can an IP54 solar spotlight stay outside year-round?


Einen Kommentar hinterlassen